
1. The Flaw Bubble - large bubbles that are usually near the edge of the resin mold or bezel you just poured. Basically popping these while sanding or cutting will result in holes and other noticeable flaws.
The fix: Make sure to pour the resin before it starts to cure to avoid difficult bubbles. Also keep agitation to a minimum. If bubbles still form, use a heat gun or pop with a pin.*
2. The Decorative Bubble - medium sized to small bubbles that occur near or under objects that retain air like paper, thread or botanical objects. Some folks quite like the resulting effect and don't considered flaws.
The fix: Make sure to seal them with modge podge or some extra resin before adding to the resin to avoid bubbles getting trapped. Also make sure to remove any bubbles from the resin before adding objects to it.
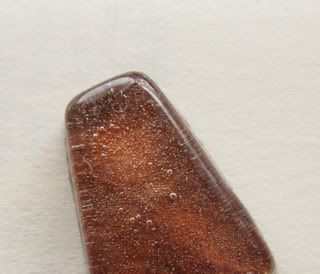
3. The Invisible Bubble - nearly imperceptible miniature bubbles that occur in the center of the mold or bezel.
The fix: I don't think there is one, but most of the fixes mentioned could help. Even if it doesn't, this type of bubble is fairly common and not considered a flaw, just the nature of resin.
*two other methods are blowing onto the resin through a straw (the CO2 helps pop the bubbles) and exposing the resin to an open flame (but be careful it's flammable). Neither are the safest options, so I don't particularly endorse them...in fact pretend you didn't hear it from me.
Here are a few tutorials I've found which were pretty helpful. Check them out.
Craft Zombie: Resin Bubbles
Two Crafty Mules: Polishing Resin
All Over Art: Resin Finishes for Tile Pendants
No comments:
Post a Comment